
I have been slacking on the Food for your Itty bitty, due to the fact that I have probably made the same 4 meals for the past 3 weeks now. We are getting ready for Delilah's party and I am trying to finish all of the projects I started. And I am not going to lie, I have started way too many I have time for. My husband has been awesome helping me out, since the majority need his expertise. But not these magnets! This is something I did while Delilah was napping and I am oh so happy with them!
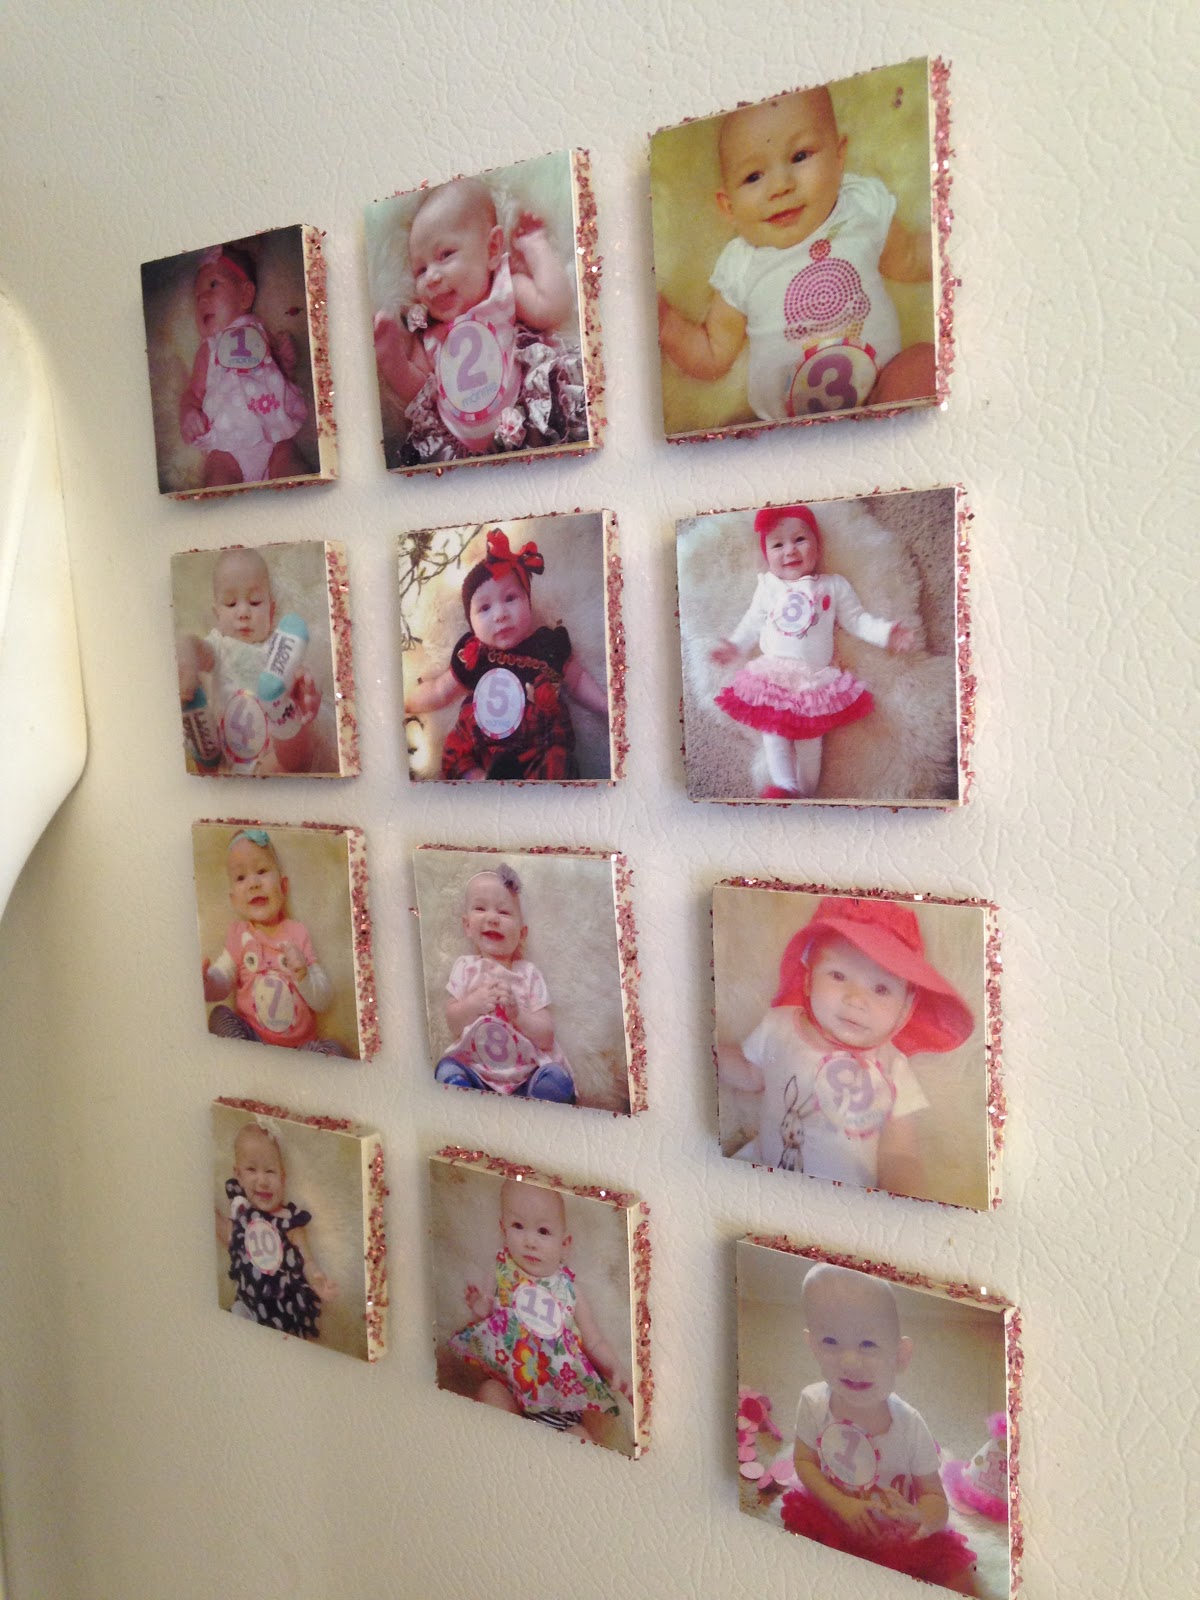
I have been taking monthly pictures of Delilah for a year now. I didn't think I would follow through, but I did and I am glad. I was wondering what I was going to do with these super cute pictures, magnets!
I have been taking monthly pictures of Delilah for a year now. I didn't think I would follow through, but I did and I am glad. I was wondering what I was going to do with these super cute pictures, magnets!

The glitter was a last minute add on. I didn't like the way the edges looked so I decided glitter, everything is better with glitter!
I originally was going to use the Mod Podge sealer, but had a bad experience with it the last time I used it, maybe I will put it on later, maybe I won't, we will see. For now, I just sealed it with regular matte Mod Podge.
I bought a sheet of 2x2 tile from Home Depot for $3.

I cut out 12 tiles and cleaned up the glue a bit.

I then cut out all of the pictures I printed off Instagram. I used instaport to download the pictures to my computer.

Glue the magnets to the back of the tile. I used a roll up magnet strip, but I am thinking that using a sheet would be better.


Brush Mod Podge on the tile and then place the picture on top, making sure to get out all of the bubbles.


Play the "Here you go" "Thank you" game.


To make the glitter edges, brush the Mod Podge and dip the edges in some glitter.


Then seal the top with more Mod Podge.

Put on your fridge and cry about how quickly a year has gone. My baby is growing up.


Love.
Now the only thing left to do is clean up the wrath of the destructo baby.

;)
No comments:
Post a Comment