Showing posts with label Make. Show all posts

Tuesday, July 22, 2014

ABC Magnets

After I made this "D" for Delilah's room, I decided why not use up the rest of my scrap fabric and make magnets for the fridge.


I really wish I would have used batting for the middle, it would have made the letters a lot sturdier, but oh well! I am sure after we loose a few, I can redo them the way I should have in the beginning. ;)

Follow the same steps from her "D", only add the magnets on the opposite fabric, so when it sticks, the letter is facing the right way. I learned this the hard way, the Z turned into a S. This is also when I would add the batting in the middle as well. I would cut out the fabric and the batting at the same time, that way you know it will all fit together. Sew the two pieces of fabric together and you've got your self magnets. 

Delilah is loving them and I am finding them everywhere! They are a great distraction while I am cooking too! She gets so proud of herself when she gets them to stick.

Enjoy!

Follow these steps for letters A-Z. I was able to cut them out freehand, but you can always trace the letters.  My size was roughly 3x3 inches.


If I was using the batting, I would have cut it out with the fabric.


Trim up the edges with your fancy edge scissors.


Is it Friday yet?


Tuesday, July 15, 2014

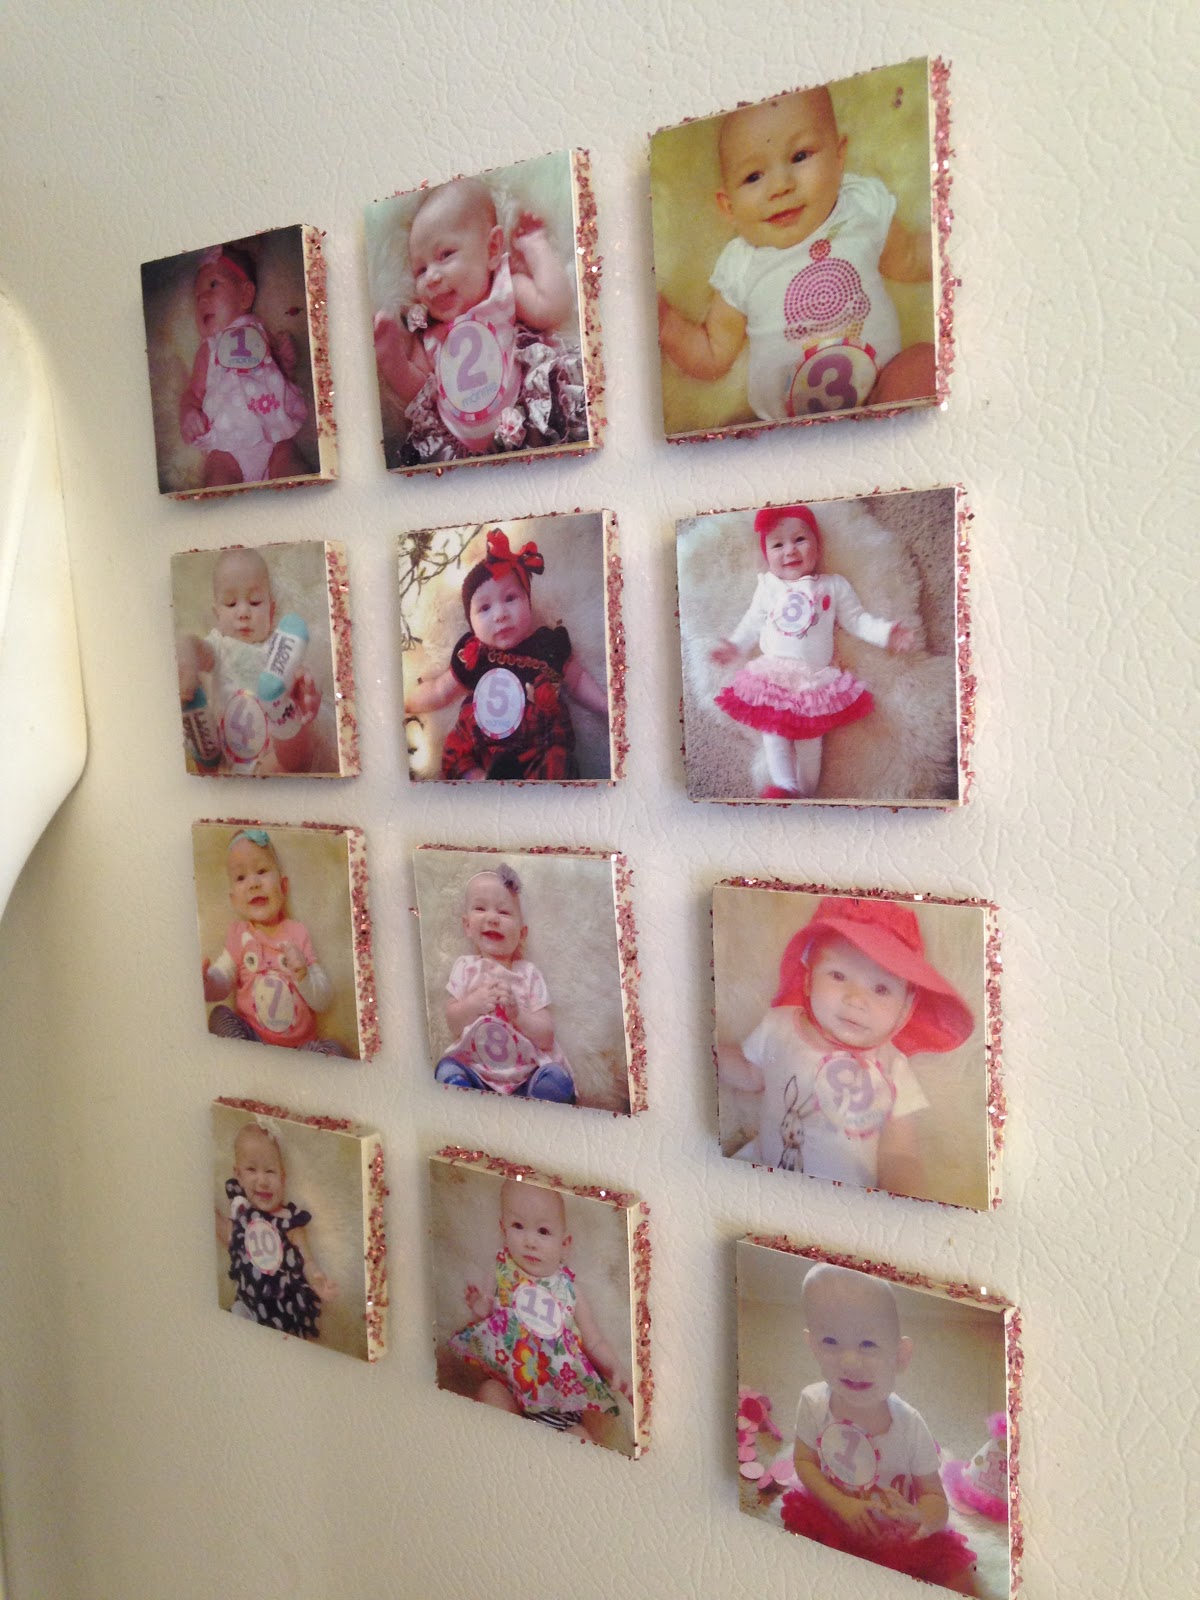
Instagram Magnets!

I have been slacking on the Food for your Itty bitty, due to the fact that I have probably made the same 4 meals for the past 3 weeks now. We are getting ready for Delilah's party and I am trying to finish all of the projects I started. And I am not going to lie, I have started way too many I have time for. My husband has been awesome helping me out, since the majority need his expertise. But not these magnets! This is something I did while Delilah was napping and I am oh so happy with them!

I have been taking monthly pictures of Delilah for a year now. I didn't think I would follow through, but I did and I am glad. I was wondering what I was going to do with these super cute pictures, magnets! 


The glitter was a last minute add on. I didn't like the way the edges looked so I decided glitter, everything is better with glitter! 

I originally was going to use the Mod Podge sealer, but had a bad experience with it the last time I used it, maybe I will put it on later, maybe I won't, we will see. For now, I just sealed it with regular matte Mod Podge.

I bought a sheet of 2x2 tile from Home Depot for $3. 


I cut out 12 tiles and cleaned up the glue a bit. 


I then cut out all of the pictures I printed off Instagram. I used instaport to download the pictures to my computer.


 Glue the magnets to the back of the tile. I used a roll up magnet strip, but I am thinking that using a sheet would be better.


Brush Mod Podge on the tile and then place the picture on top, making sure to get out all of the bubbles.


Play the "Here you go" "Thank you" game.


To make the glitter edges, brush the Mod Podge and dip the edges in some glitter.


Then seal the top with more Mod Podge.


Put on your fridge and cry about how quickly a year has gone. My baby is growing up.


Love.

Now the only thing left to do is clean up the wrath of the destructo baby.


;)


Saturday, July 12, 2014

"D" is for Delilah

I wanted a small "D" for Delilah's room so you better bet I made one today! She was very excited about it as well, she kept pointing at it and smiling. I am no seamstress but I am happy with the results and it fits perfectly right where I wanted it!


Google+ just added some really neat editing tools, loving it!

Like I mentioned before, I always have extra craft stuff laying around, it is tucked away in an organized mess in the corner of the guest bedroom. I have a ton of fabric left over from Delilah's bird mobile, so I decided to use some of that. I also have filling that I have used for various crochet projects, dino lovey, miniture dragons, and stuffed fish ;), I think I will go get some batting though, I think it would have made this particular project a little easier. Regardless, it took about 30 minutes from start to finish.


Start with a square about 4 x 4 inches. Get decorative scissors and cut your desired letter. Mine was a "D".


To cut out the middle, I folded the D in half and cut for the thickness I wanted.


It is time to sew!


Start sewing the middle first, I tried doing the outside first and that did not work out so well. After the middle is sewn, start sewing the outside but do it in steps that way you can stuff as you go. I use a paintbrush to help me push in the fluff.


The contrasting color, though was what I wanted, made for you to see every little mistake that I made, maybe a neutral thread would be better next time!


All done!

I will try to get back into crocheting, you can make such cute things. I really love doing it but it is just a little more time consuming and time is a lost thing around here ;)


Wednesday, July 2, 2014

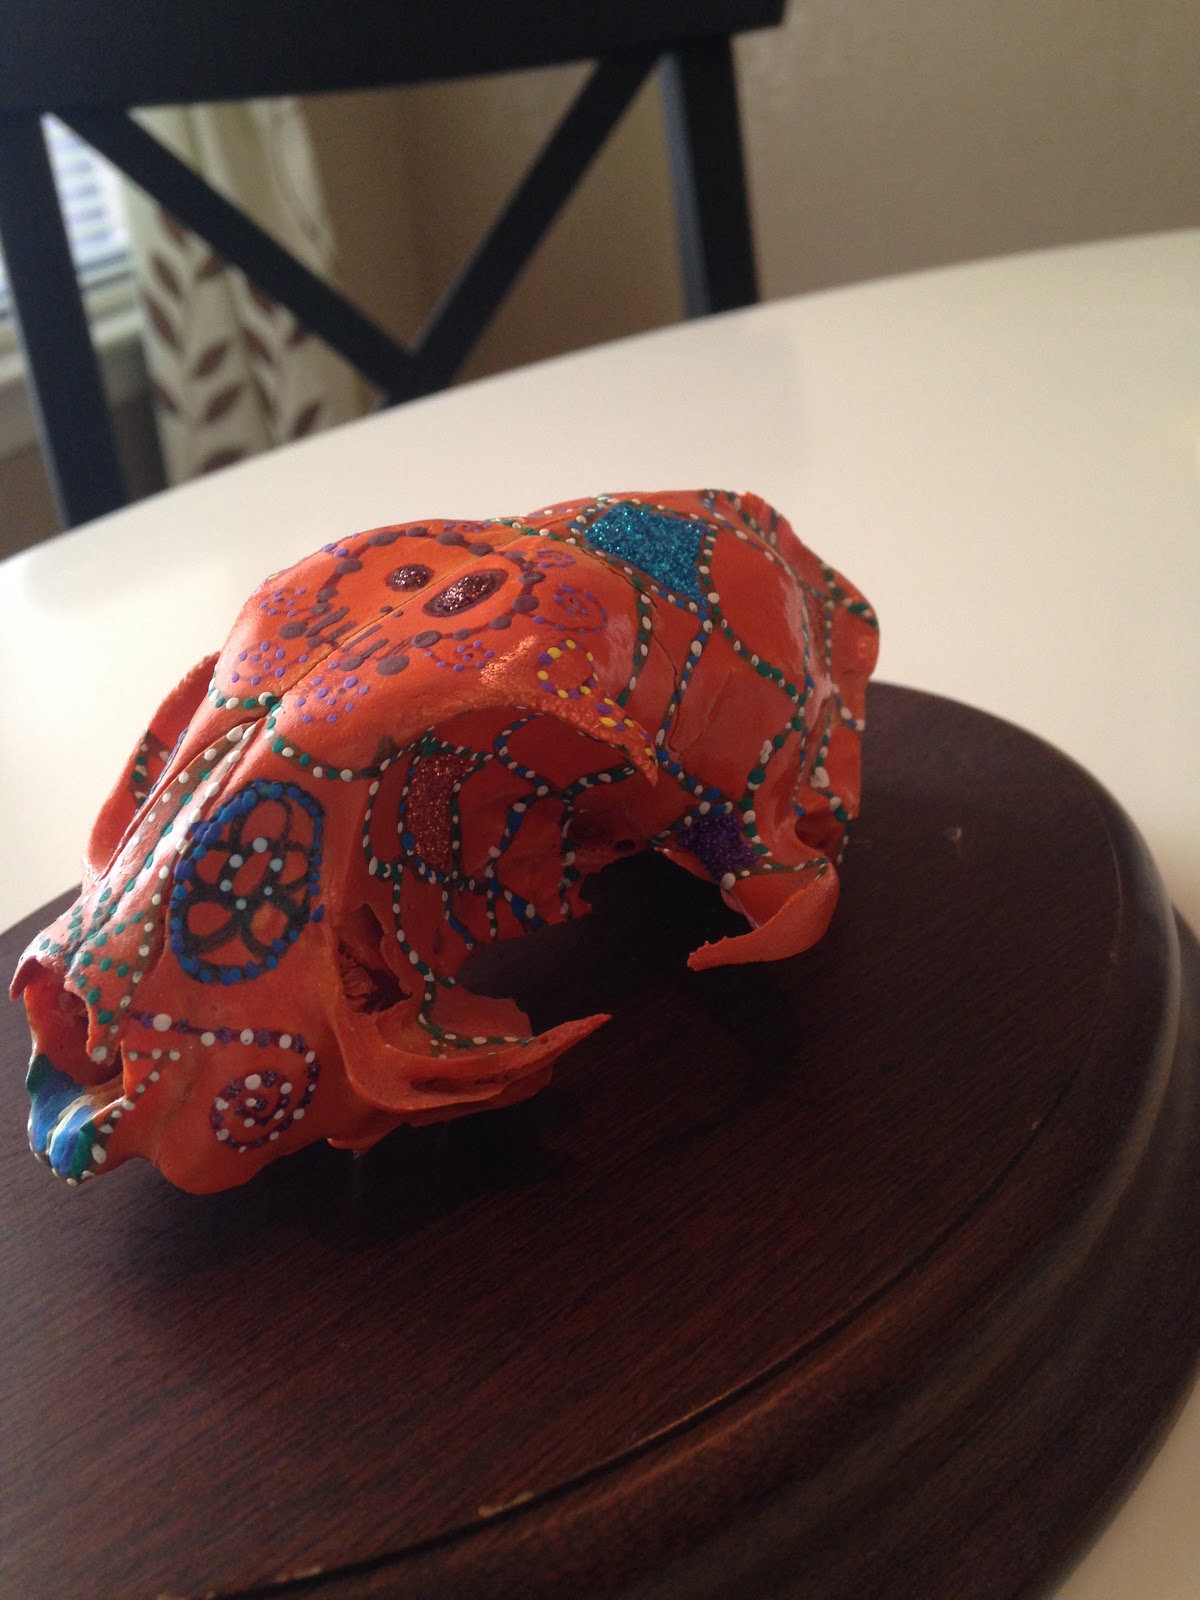
Pretty Skulls

What do you do when your husband collects animal skulls he finds in the wilderness? Well… you make them pretty. He knows that in any other circumstance, skulls, heads, or bones are not permitted in the house. That has not stopped him from bringing them home, they just stay in the garage. I have gotten creative and this is what has come out of his weird hobby. I also have used antlers as decorations. Sometimes, you just can't fight it.


There you have it! Pretty Skulls! 


"Beauty is in the eye of the beholder."


**Message me if you are interested in one of these little gems. I would be more than happy to personalize a skull for you. That may have been the strangest sentence I have ever typed.